Apple HomeKit Control of GivEnergy Inverters

I’ve seen quite a few people asking if you can control a GivEnergy battery using Apple HomeKit and the answer is yes, sort of, so keep reading and I’ll show you how you can achieve this, and also go over a few of the current limitations.
Controlling a GivEnergy inverter using Apple HomeKit is entirely possible. That means using the Home app on your iPhone or iPad, and even being able to ask Siri too. Now, this isn’t going to be an exact how-to guide because you may have different ideas as to what you want to be able to control here. What I’m going to do instead is show you *what* I’ve configured, and I’ll try and show you *how* I configured it too, so please be aware that this isn’t for beginners and will assume that you already have a bit of experience with Home Assistant. Yes, Home Assistant, because if you haven’t guessed it yet then you will need Home Assistant up and running somewhere in order to act as a bridge between HomeKit and GivEnergy. So step 1, make sure you have Home Assistant already running nicely and there are many guides out there already showing you what Home Assistant is and how to configure it.
GivEnergy to Home Assistant (GivTCP)
Step 2 then, you’ll need to connect your Home Assistant installation to your GivEnergy inverter so as it can monitor and control it. Follow the instructions in this article to install the GivTCP add-on.

HomeKit to Home Assistant
After you’ve got that working, step 3 is to connect Home Assistant to HomeKit. It probably won’t surprise you to know that I also have another video on that! It’s almost like I might have been planning this for a while and building up to this. Go and check out that video and come back here once you have that all configured.

Control Ideas
So you now should have Home Assistant talking to both your GivEnergy inverter and HomeKit. Great, but the two still can’t quite talk to each other yet. This is the point at which you need to decide exactly what you want to do with HomeKit because we’re going to need to write an individual script for each action. Now, I have a few suggestions for things I’ve found useful but basically you might have other better ideas. Maybe start with these and see how you get on. My three suggestions are:
- Pause the battery discharge: This is useful if you want to charge your car during the day and don’t want to drain your battery.
- Resume the battery discharge: The opposite of pausing the battery and places the inverter into 'eco' mode.
- Force charge the battery: Charges the battery from the grid (or residual solar) at full speed for a set period of time.
Home Assistant Scripts
For each of these three functions, you must first create a script within Home Assistant to perform the actions. Check out the configuration below for the three scripts that I am using:
alias: "GivEnergy: Pause Battery"
sequence:
  - service: switch.turn_off
    data: {}
    target:
      entity_id: switch.givtcp_xxxxxxxxxx_enable_discharge
  - delay:
      hours: 0
      minutes: 1
      seconds: 0
      milliseconds: 0
  - stop: ""
mode: single
alias: "GivEnergy: Resume Battery"
sequence:
  - service: select.select_option
    data:
      option: Eco
    target:
      entity_id: select.givtcp_xxxxxxxxxx_mode
  - delay:
      hours: 0
      minutes: 1
      seconds: 0
      milliseconds: 0
  - stop: ""
mode: single
alias: "GivEnergy: Force Charge The Battery (15 minutes)"
sequence:
  - service: select.select_option
    data:
      option: "15"
    target:
      entity_id: select.givtcp_xxxxxxxxxx_force_charge
  - delay:
      hours: 0
      minutes: 1
      seconds: 0
      milliseconds: 0
  - stop: ""
mode: single
Let's break these scripts down a bit. For all scripts, make sure to replace the xxxxxxxxxx with the ID of your actual inverter - those entities I reference must match the actual real entities that GivTCP has created for you in Home Assistant.
For the pause and resume scripts, there are a few ways of achieving this same functionality. I've chosen to totally pause discharge using a toggle, however I'm aware that others prefer to simply adjust the maximum power output of the inverter instead. Both are valid ways of achieving the same result, and you can configure your version of the scripts to do whatever you like!
Note that I have a delay at the end of each script of 1 minute, plus a stop action. This is purely to delay the finish of the script. If you run the script without this, it immediately turns on, performs its actions, and turns off in the blink of an eye. By adding a delay at the end the script will visually stay on for longer so as you can easily see that you have just turned it on. It prevents you repeatedly turning it on because you didn't think it worked the first time!
Finally there’s the force charge script. Now, unfortunately due to a limitation in how HomeKit works, we can’t pass parameters in. So for example I can’t say "Hey Siri, force charge the battery for 15 minutes", or "30 minutes", then use the same script to process the value I said and set the charge time dynamically. Sadly we must hard code the charge time manually and for this example I’ve set it to 15 minutes. I don’t actually use this one myself, I’ve created it purely as an example for you. All we’re doing here is calling the select.select_option service against the force charge entity. Now the values you can pass it are very specific so if in doubt go and take a look at the force charge entity itself and see which values you can use.
Once you’ve created your scripts and tested them, you’ll need to tell HomeKit about them. For each of the three scripts in your scripts list, click on the 3 dots to the right of the line item and select information. Click on the cog and make a note of the entity ID, or copy it to the clipboard.
Now over in File editor, find your HomeKit configuration - revisit the HomeKit video if you can’t remember where that is! In your include_entities list you should add a line for each of your automations. Save the file, then reload your HomeKit configuration using Developer Tools. Here's my example HomeKit configuration just to demonstrate... please adapt to your own needs!
homekit:
  - name: HASS Bridge
    port: 51828
    filter:
      include_entities:
        - script.givenergy_pause_battery
        - script.givenergy_resume_battery
        - script.givenergy_force_charge_the_battery_15_minutes
Apple Home App
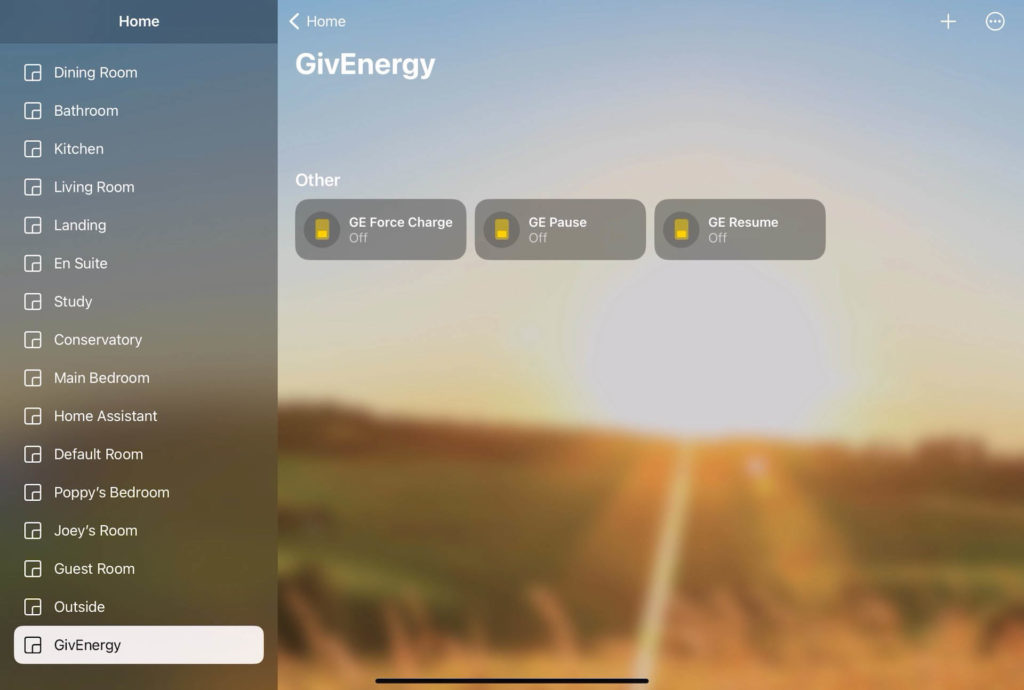
All being well, those scripts should now be presented in your Apple Home app as switches. I’ve created a room in Home called GivEnergy just to keep these GivEnergy devices organised and separate. I’ve renamed them from the names they inherited from Home Assistant because they were too long to be readable, so in my screenshot you can see I now have switches for "GE force charge", "GE Pause" and "GE resume". I can toggle them from here if I want, and if you don’t care about Siri then you’re done!

Obviously it’s a lot more fun shouting at Siri to control these. By default, I should now be able to say something like "Hey Siri Turn on GE Pause", but that’s not very elegant. To improve on this we must use Siri Shortcuts.
Siri Shortcuts
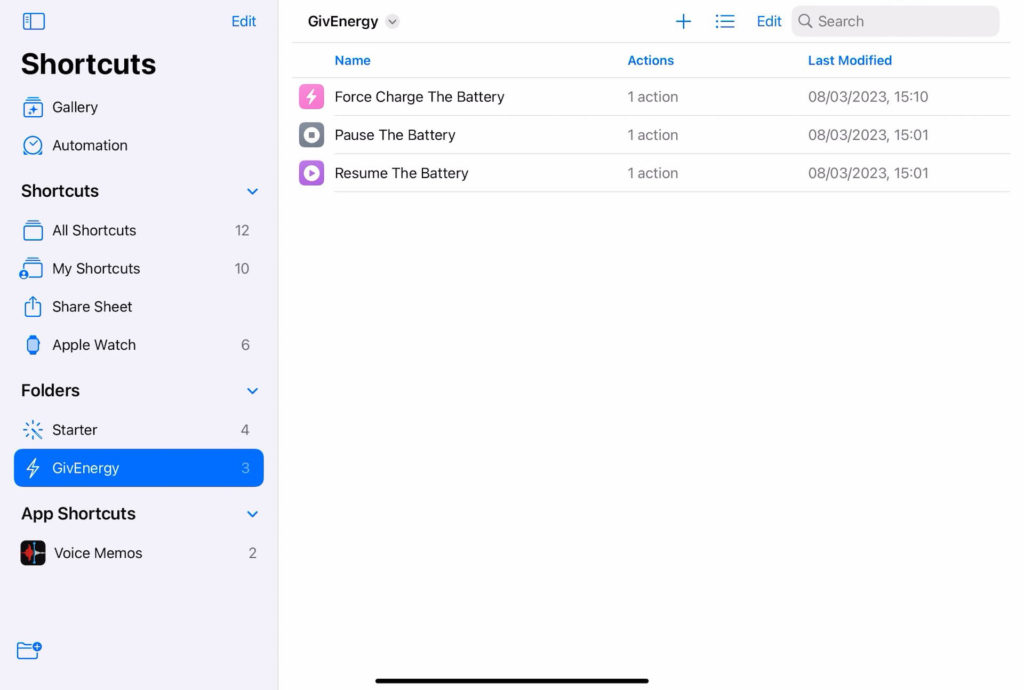
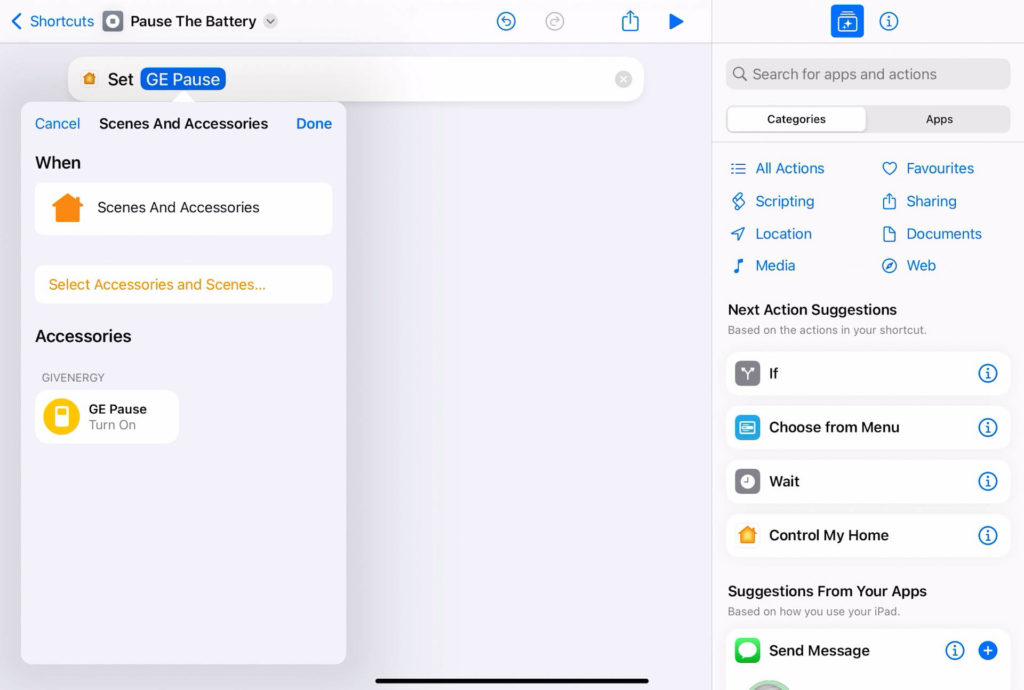
Over in the Shortcuts app I’ve created a shortcut for each of those switches. Inside each Shortcut is just one single action: a ‘Control My Home’ action (note, My Home is the default name of My Home! If you named your Home something different when you set up the Home app, then it'll say "Control Something Different" or whatever...). If I tap the accessory in the action, you can see I chose the "GE Pause" accessory in the case of this particular shortcut (see screenshots), and I set the action to turn it on. I’ve then made sure that the name of the shortcut is the exact phrasing I want to say to Siri to activate this shortcut. In this case I want to say “Hey Siri, Pause the battery”, so I've named the shortcut "Pause the battery".


And with that, you should be all good to go to control any aspect of your GivEnergy inverter from HomeKit and with a bit more effort Siri. I hope you found this useful, and if you did then please give the video a like on YouTube. If you’ve come up with any novel and interesting uses for controlling GivEnergy with HomeKit then please share your ideas in the video's comments, I’d love to see them.


