
Standing Charges in the Home Assistant Energy Dashboard

So for some reason a lot of you guys want to be able to track your energy provider’s standing charges in Home Assistant’s Energy Dashboard. It’s probably the most requested thing in the comments on the videos I’ve made about the energy dashboard so far. So I’m finally giving in and showing you a way to do that, and it’s a bit complex which is why I’ve avoided it. You have been warned!
- Get the Standing Charge Rate - Octopus Energy Customers
- Get the Standing Charge Rate - Manual Method
- Cumulative Standing Charge Entities
- Cumulative Standing Charge Automation
- The Energy Sensor Bodge
- Configure the Energy Dashboard
- Conclusion
Now getting your energy dashboard to show you your standing charges is a bit of a bodge. It’s not designed to show fixed costs so we have to try and lever the functionality in. The good news here though is that the method I’m about to show you will work with any tariff. Yes even Octopus Agile! So before we start, I’m going to assume you already have your energy dashboard set up to track your energy usage. Whether that’s for a standard tariff or an Octopus smart tariff there are many ways to do that and I won’t be covering it in this article. But, I have created two other videos that you can take a look at if you want to know how to set it all up:
So first things first, Home Assistant needs to know how much your standing charge is per day. If you are an Octopus Energy customer then that’s really easy to do. Install the Octopus Energy integration from BottlecapDave using HACS and you’ll end up with all of the entities you need! For what I’m going to show you today though I’m going to concentrate on the electricity meter for imported energy, but all of the same principles could apply to a gas meter to if you wanted to track the standing charge for that.
BEFORE YOU START! If you are an Octopus Energy customer then start with the dedicated Octopus Energy section below before moving on to the Cumulative Standing Charge Entities section and following the guide EXACTLY. The only place you need to adjust the entity IDs to match one from the Octopus Energy integration is when you create the automation. Everything else should be created as per this guide. If you are not an Octopus Energy customer, or want to manually input your standing charge, jump to the Get the Standing Charge Rate - Manual Method section.
Get the Standing Charge Rate - Octopus Energy Customers
I’m not going to go over the installation process for the Octopus Energy integration in this article but it’s pretty straightforward. Just visit the integration's page (https://github.com/BottlecapDave/HomeAssistant-OctopusEnergy) and follow the installation and configuration instructions. Once you have the Octopus Energy integration up and running:
- Navigate to Settings > Devices & Services and locate the 'Octopus Energy' item on the Integrations page.
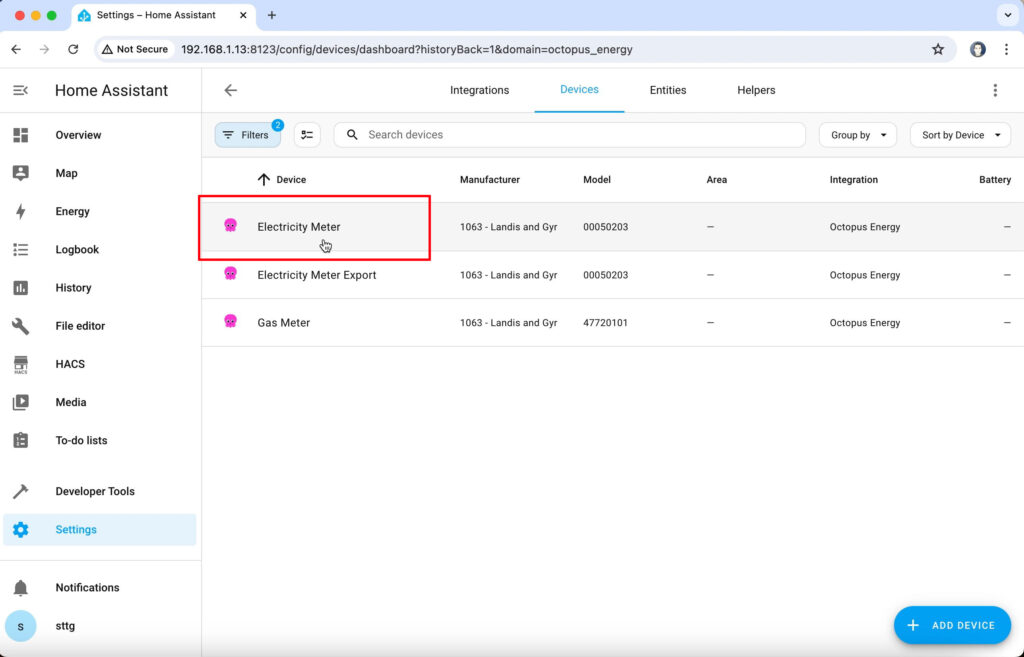
- Select the 'Devices' link underneath the Octopus logo (in my screenshots it says 3 Devices, but the quantity you see might vary).
- Find your electricity import meter in the list and click on it to open up the associated entities.
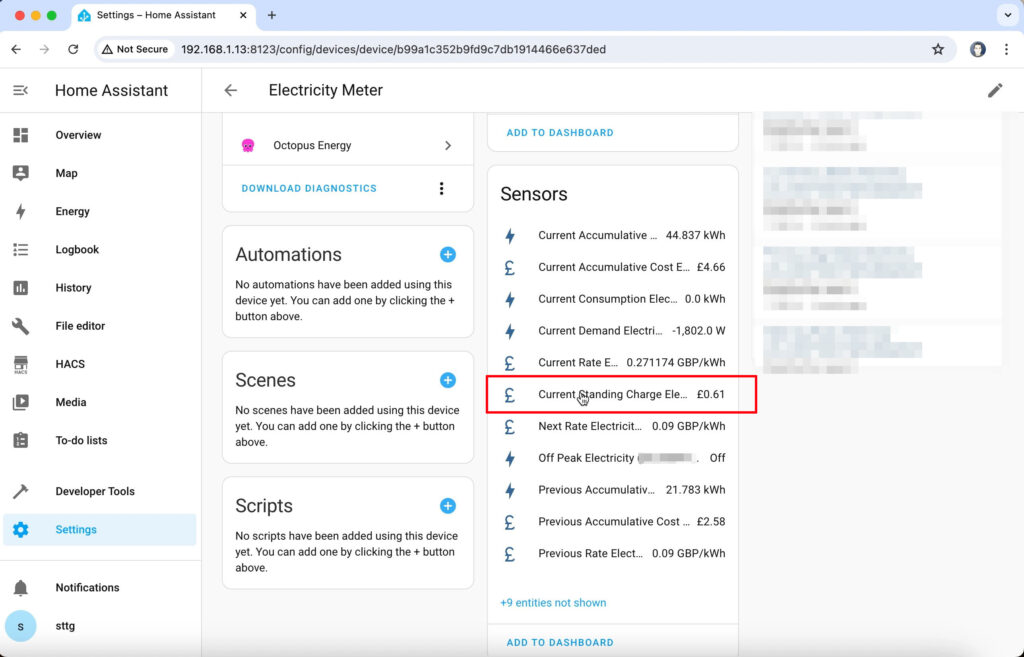
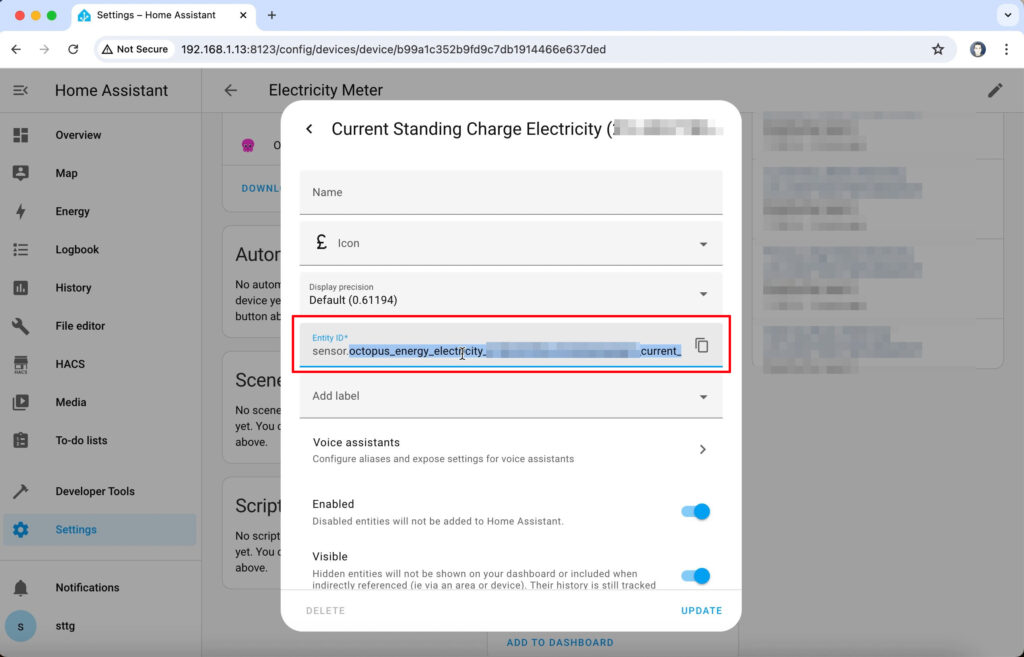
- Look for the entity with 'Current Standing Charge' in the name and click on it to view its details.
- Click on the cog icon in the top-right of the entity details window and make a note of the entity's entity ID. You will need this for an automation later in this tutorial.
Octopus Energy using my referral link:
speaktothegeek.co.uk/energy

Existing customer? Find out how you can benefit too. T&Cs apply (only one switching offer per household)

Get the Standing Charge Rate - Manual Method
If for some reason you aren’t with Octopus Energy then you are going to need to create a special helper entity to manually store your standing charge rate.
- Navigate to Settings > Devices & Services > Helpers (tab at the top)
- Click on the Create Helper button in the bottom-right
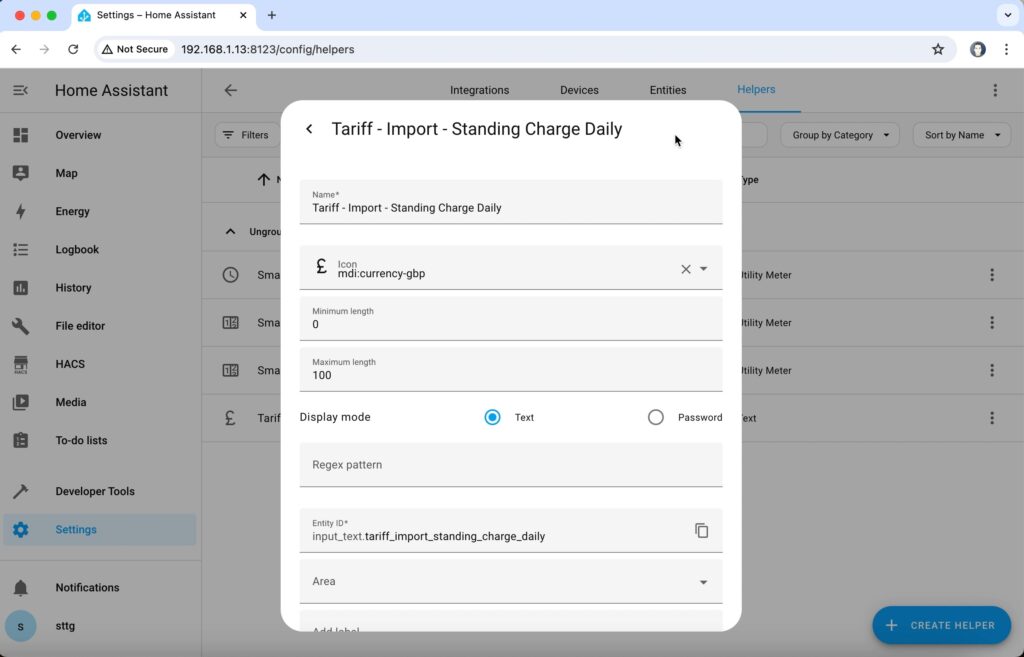
- Create a helper of the type 'Text'
- Give it a name of "Tariff - Import - Standing Charge Daily"
- Optional - give it an icon of "currency-gbp"
- Make sure that the display mode = text
- Save the helper
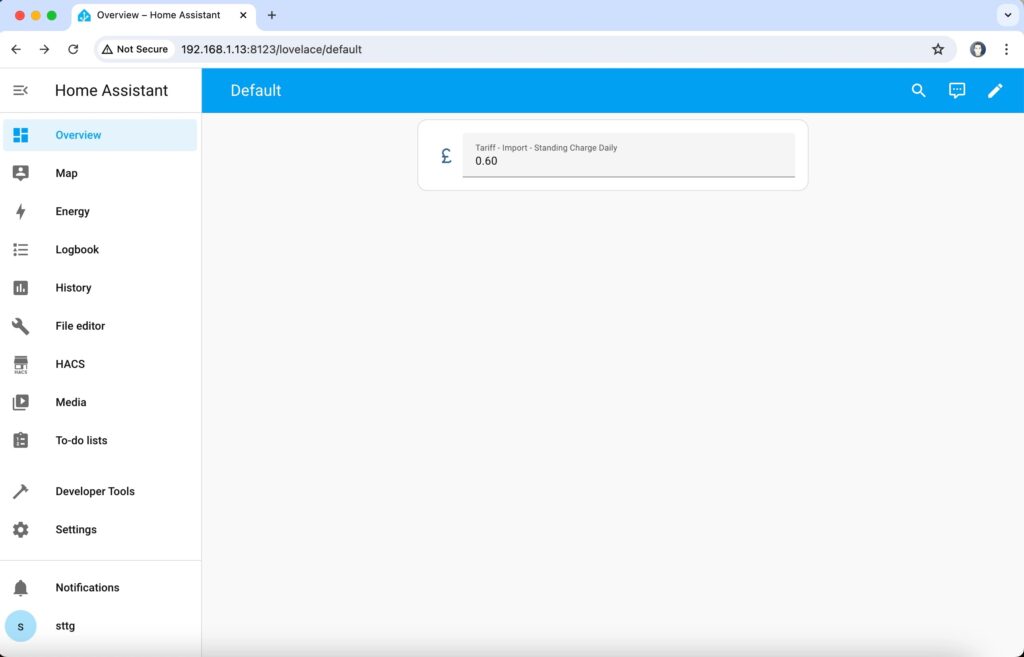
To use this nice and easily I suggest you add the helper to your dashboard in an 'entities' card. Once it's displayed on a card, edit the value to show the actual value of your tariff's standing charge. For example, if your standing charge is 60p per day, set the helper's value to "0.60".
Cumulative Standing Charge Entities
Ok, so we now have our standing charge in Home Assistant, whether that’s directly from Octopus Energy, or manually typed in. The next step is to create a few more helper entities. We need another text entity that will be used to store the cumulative standing charges, so every day that value will be increased by the amount of your standing charge. If it’s 60p per day then that text entity will be 60p on day 1, £1.20 on day 2, £1.80 on day 3 and so on increasing forever. But a text entity isn’t seen by Home Assistant as a sensor containing a monetary value so we also have to create a template sensor that takes that text entity value and converts it to a numeric sensor. It is important to use the exact same entity names as I am using here in order for the automations and template sensors to work correctly. If you choose to change the names, you will need to update all templates and automations referencing the various entities to use your different chosen entity IDs.
Let's start with the text helper:
- Navigate to Settings > Devices & Services > Helpers (tab at the top)
- Click on the Create Helper button in the bottom-right
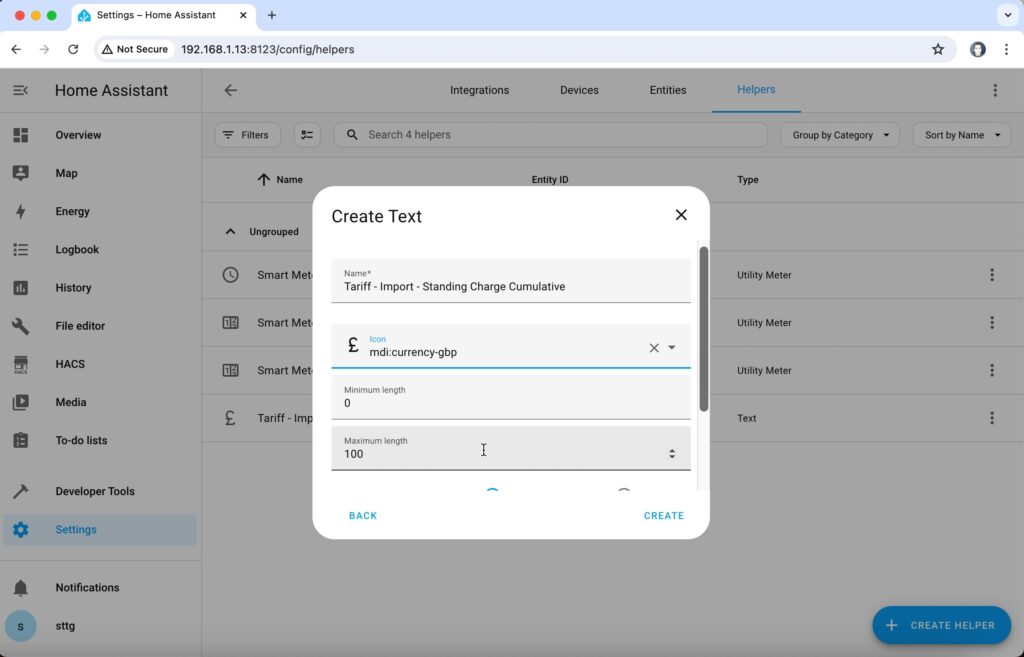
- Create a helper of the type 'Text'
- Give it a name of "Tariff - Import - Standing Charge Cumulative"
- Optional - give it an icon of "currency-gbp"
- Make sure that the display mode = text
- Save the helper
Now to create the monetary sensor wrapping the text helper:
- Navigate to Settings > Devices & Services > Helpers (tab at the top)
- Click on the Create Helper button in the bottom-right
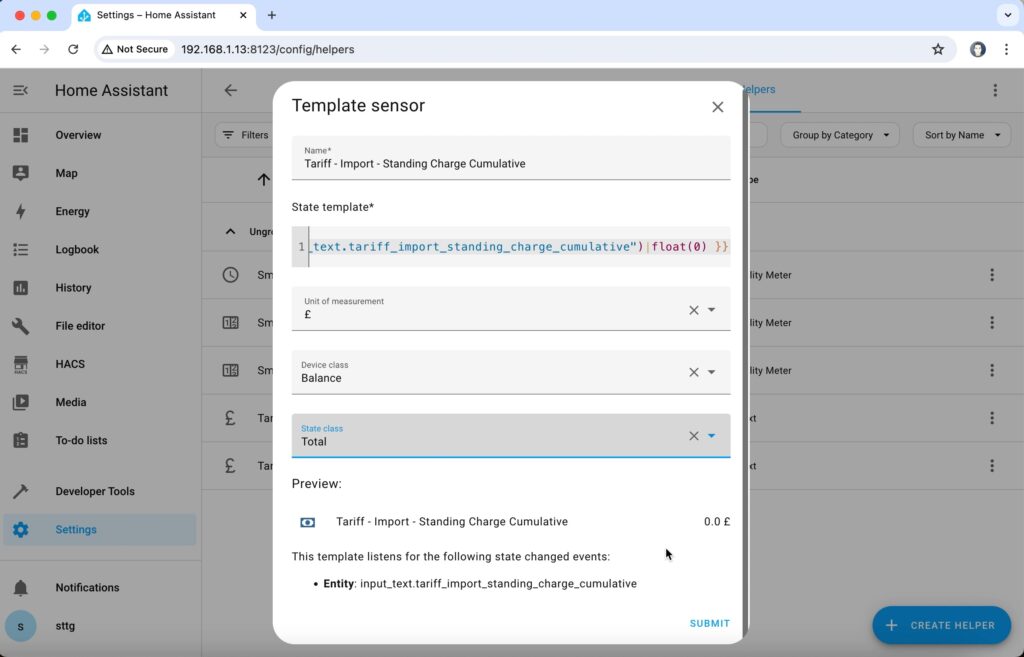
- Create a helper of the type 'Template'
- Choose the option to 'template a sensor'
- Give it a name of "Tariff - Import - Standing Charge Cumulative" which is identical to the previous one you created.
- For the state template field, paste in the following template code:
{{ states("input_text.tariff_import_standing_charge_cumulative")|float(0) }}- The unit of measurement is: £
- The Device Class is "monetary"
- The State Class is "Total"
- Click on Submit to save the helper.
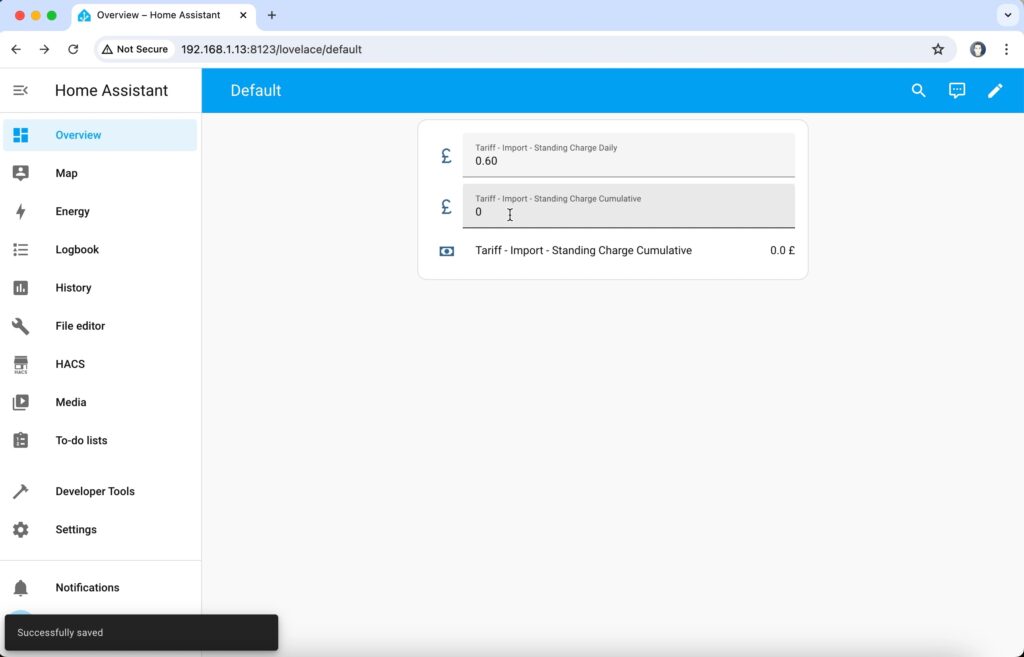
Navigate back to your dashboard where you previously added the manual standing charge if you are doing this manually and add the two new entities named "Tariff - Import - Standing Charge Cumulative", both the input_text and the sensor entities, to the entities card. If you are using the Octopus Energy integration to obtain your standing charge then I recommend you create a new entities card on your dashboard to display the current standing charge entity and these two new ones just created.
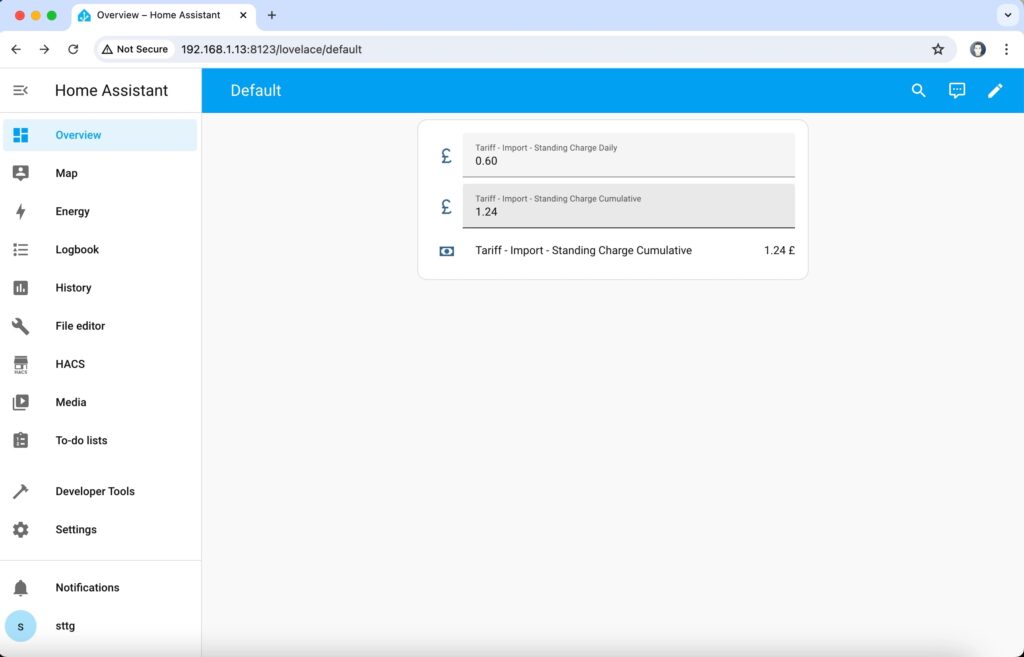
Test that the template sensor is working by editing the value of the input_text entity. For example, if you type in 1.20 into the input_text entity then you should see the sensor entity value update to £1.20.
Cumulative Standing Charge Automation
The next thing to do is create an automation that runs once a day, takes that cumulative total standing charge value and adds the current standing charge to it so as every day you’ll see that cumulative sensor increasing.

- Navigate to Settings > Automations & Scenes
- Click on the 'Create Automation' button in the bottom-right
- Choose the option to 'Create new Automation'
- Click on the three vertical dots in the top-right and choose 'Edit in YAML'
- Copy and paste the below automation over the top of the default contents:
alias: Standing Charge Tracker - Energy Import
description: ""
trigger:
  - platform: time
    at: "00:00:00"
condition: []
action:
  - service: input_text.set_value
    metadata: {}
    data:
      value: >-
        {{
        states('input_text.tariff_import_standing_charge_cumulative')|float(0)
        +  states('input_text.tariff_import_standing_charge_daily')|float(0)}}
    target:
      entity_id: input_text.tariff_import_standing_charge_cumulative
mode: single
If you are using the manual standing charge method and have named your helper entities exactly as per this tutorial then the above automation should work with no alteration. If you are using the Octopus Energy integration to obtain your standing charge rate then you should replace the entity ID 'input_text.tariff_import_standing_charge_daily' with the actual entity ID of the sensor supplying that value, which I hope you made a note of in the very first step of this guide! Update the automation with the required entity IDs if necessary, save the automation and ensure that it's enabled.
This automation will run at midnight every night and add the daily standing charge value to the cumulative value basically increasing it every day by that amount forever.
The Energy Sensor Bodge
So we’re now at the point where Home Assistant is tracking your total standing charges over time. But how do we get the Energy Dashboard to show that then? Well that’s where the bodge comes in. You see the energy dashboard only cares about energy sensors. You can attach a cost sensor to an energy sensor in the dashboard, but we don’t want to show any energy usage associated with a standing charge. To get around this we create a dummy energy sensor that will always have a value of zero.
- Navigate to Settings > Devices & Services > Helpers (tab at the top)
- Click on the Create Helper button in the bottom-right
- Create a helper of the type 'Template'
- Choose the option to 'template a sensor'
- Give it a name of "Standing Charge - Electricity"
- For the state template field, paste in the following template code: {{ 0 }}
- Unit of Measurement = kWh
- Device Class = Energy
- State Class = Total
Save the sensor and open it up to check that it is indeed display a static "0 kWh" value.
Configure the Energy Dashboard
And finally we can put this all together into the Energy Dashboard. Now if you have only just set this up then your energy dashboard might take a few hours to start populating with data. If nothing is appearing straight away then give it 24 hours and have another look, you’ll probably find it’s working fine by then.
- Navigate to Settings > Dashboards > Energy
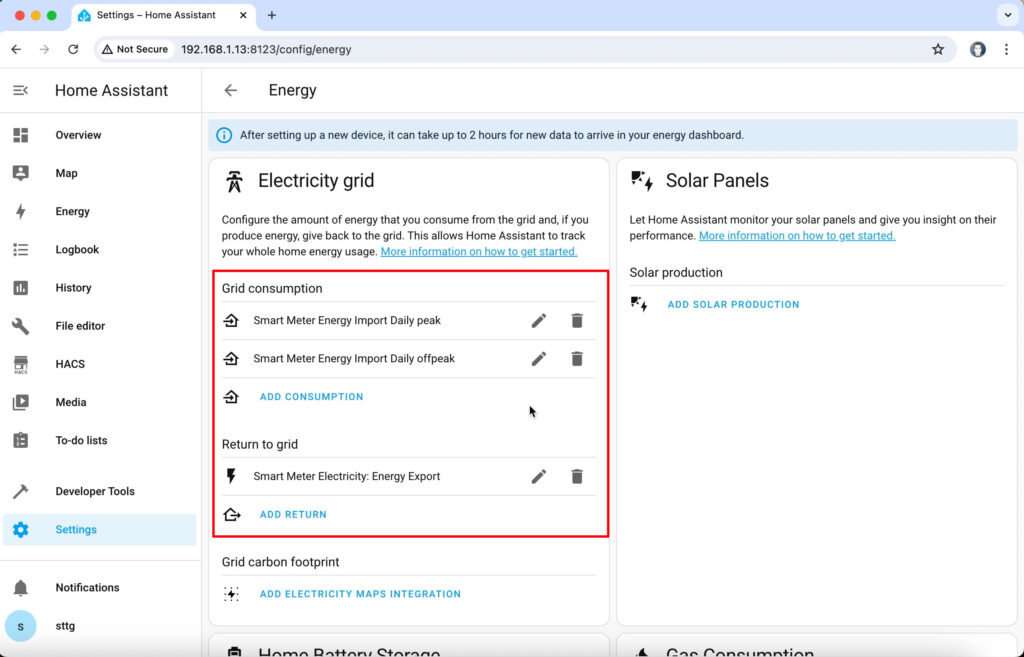
If you look at my screenshots, you'll see I already have Grid Consumption entities configured for my peak and off-peak energy usage as set up using the guides in some of my other videos. We're going to add a new Grid Consumption entity here:
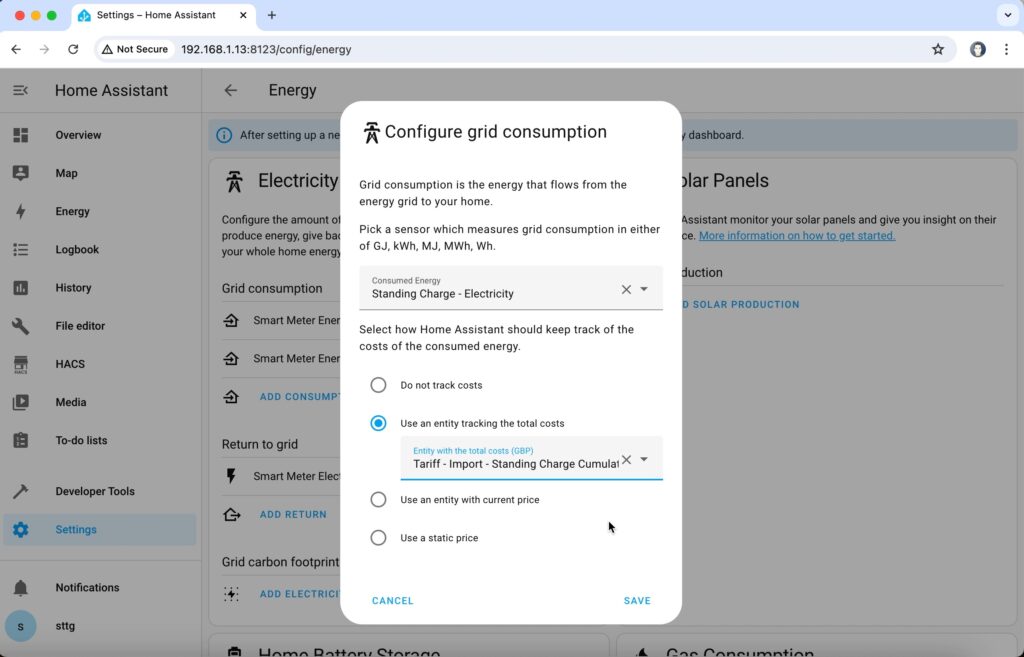
- Click on the 'Add Consumption' button
- In the 'Consumed Energy' box choose the dummy energy sensor "Standing Charge - Electricity"
- Select the option 'Use the entity tracking the total costs'
- In the 'entity with the total costs' box, select the "Tariff - Import - Standing Charge Cumulative" sensor.
- Click on Save.
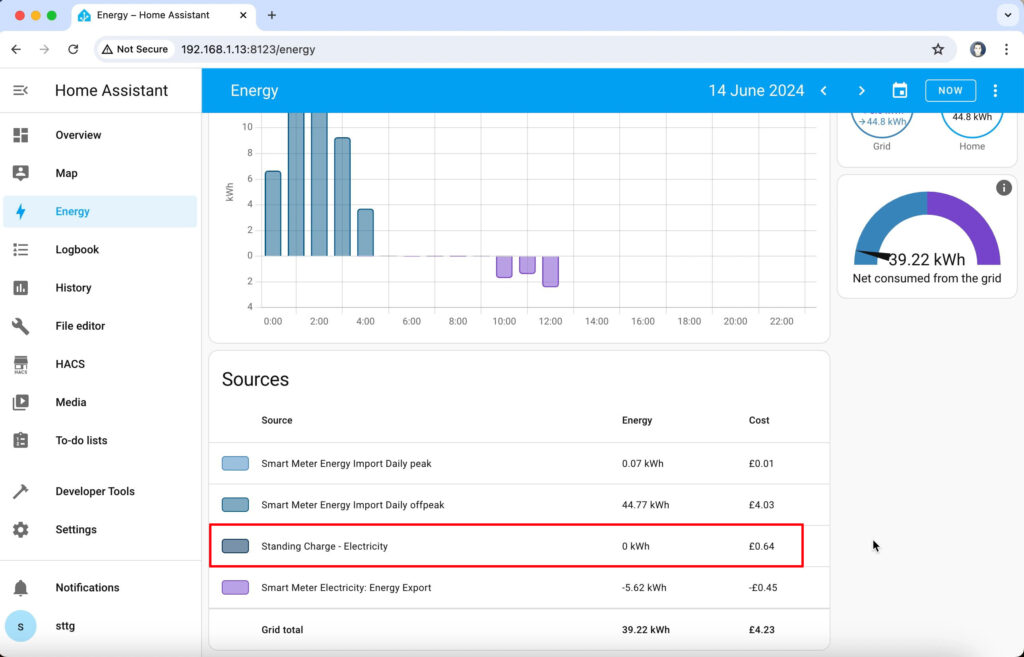
You should now be able to navigate to the Energy Dashboard and see a new line item in the sources list for "Standing Charge - Electricity" which will show an energy value of zero, but a cost value matching that of your daily standing charge. Choosing a time period such as a week or a month will eventually show you the total standing charge costs for that time period.
Conclusion
So yes, it’s a bit of a bodge to add that in so you can probably understand now why I hadn’t gone to the effort of showing this process before. And I know there are other ways of achieving this but none of the alternative methods out there allow you to nicely track all of the different sources separately, you just end up with one total cost and no breakdown, so that’s why I think this method is the best.