Octopus Free Electricity Session Automation for Home Assistant

If you’re an Octopus Energy customer with a smart meter then you may have had the emails from them about the free electricity sessions they’ve been running. Well if you have Home Assistant running your smart home and want to make the most of these sessions then I’ve put together an automation that can help make your life a bit easier.
So the idea behind these free electricity sessions is that on certain days there’s too much energy going into the grid, so that might be from solar farms on really sunny days or wind farms on windy days. Normally that would go to waste because suppliers could be asked to curtail their production to keep the grid stable. So instead of doing that, Octopus are asking people to use it up for free. You need a smart meter because they need to know how much you used, and they’ll only let you have your energy for free over and above what you would normally use at that time of day. So if you normally use 0.5kWh you’ll still pay for that 0.5kWh, but anything you use on top of that is free and they credit your account about a week later.
Octopus Energy using my referral link:
speaktothegeek.co.uk/energy

Ok, let’s set the scene for the automation then. I’ve got two GivEnergy batteries in my garage and I want to make sure that they charge from the grid during that hour. I have special settings on them to restrict their power output so I need to change those beforehand and set them back again afterwards. I also have a heat pump and I’ll want to boost my hot water tank during that hour too. Then hopefully the car is at home so I’ll need to set that to start and stop charging for the session too. You will have your own requirements and they’ll almost certainly be different to mine so what I’m going to show you in this article is the basic construct of the automation. You can then put in your own before and after actions, and I’ll show you what I’ve done in my case too.
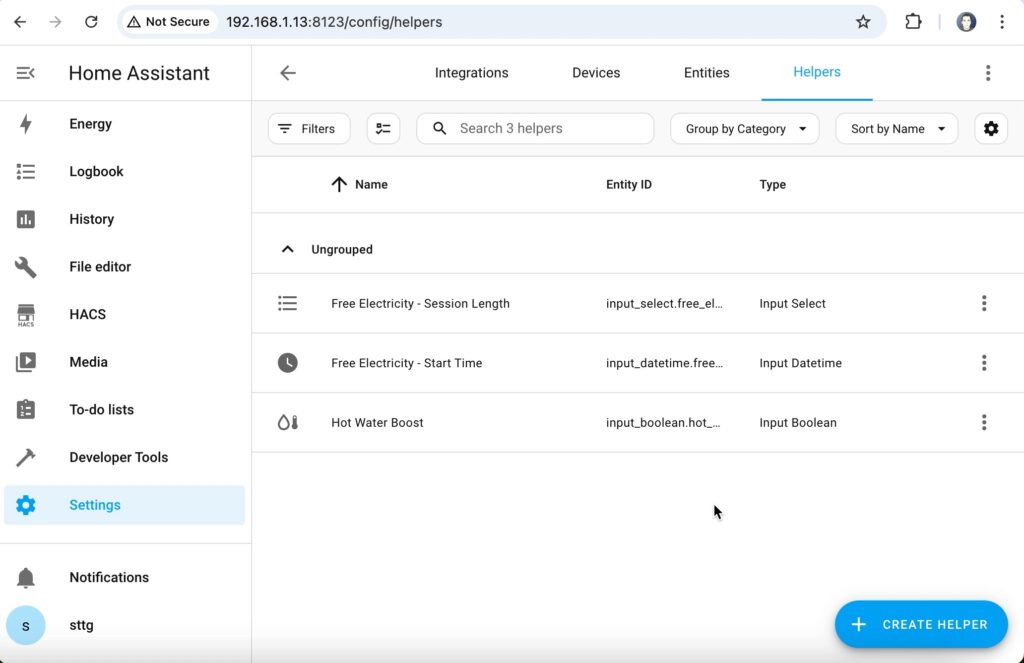
Start by creating two helpers: navigate to Settings > Devices & Services and select the Helpers tab at the top, then click the Create Helper button.
- First Helper
- Type: Date or Time
- Name: "Free Electricity - Start Time"
- Select the option to store a Time only.
- Second Helper
- Type: Dropdown
- Name: "Free Electricity - Session Length"
- Add the following options:
- 60
- 90
- 120
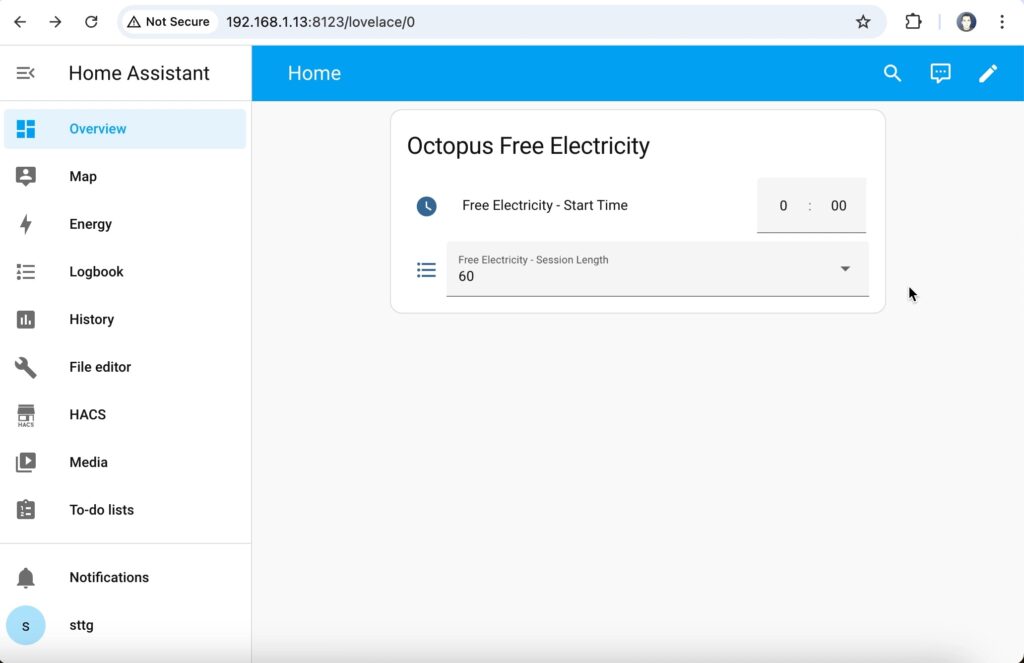
Now navigate to your dashboard and add a new card of type 'entities' listing those two "Free Electricity" helpers you've just created. This will help you easily adjust the scheduling of the automation which we're about to create.
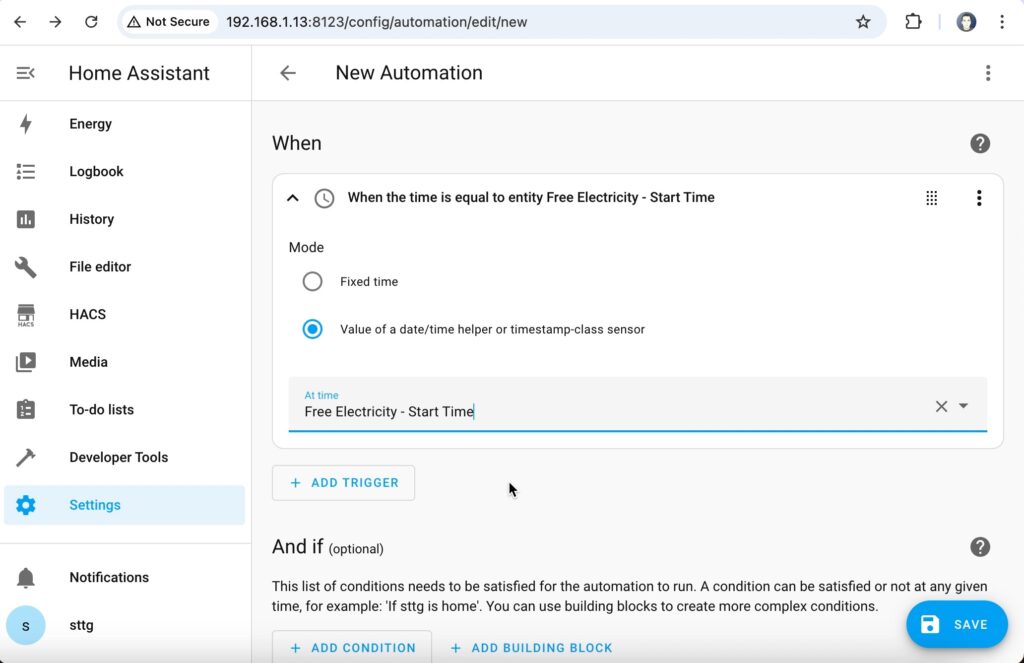
Next we create a new automation: navigate to Settings > Automations & Scenes and click on the Create Automation button. Create a new trigger of the type 'Time', choose the option to use a Value of a date/time helper then select the "Free Electricity - Start Time" helper from the drop-down.
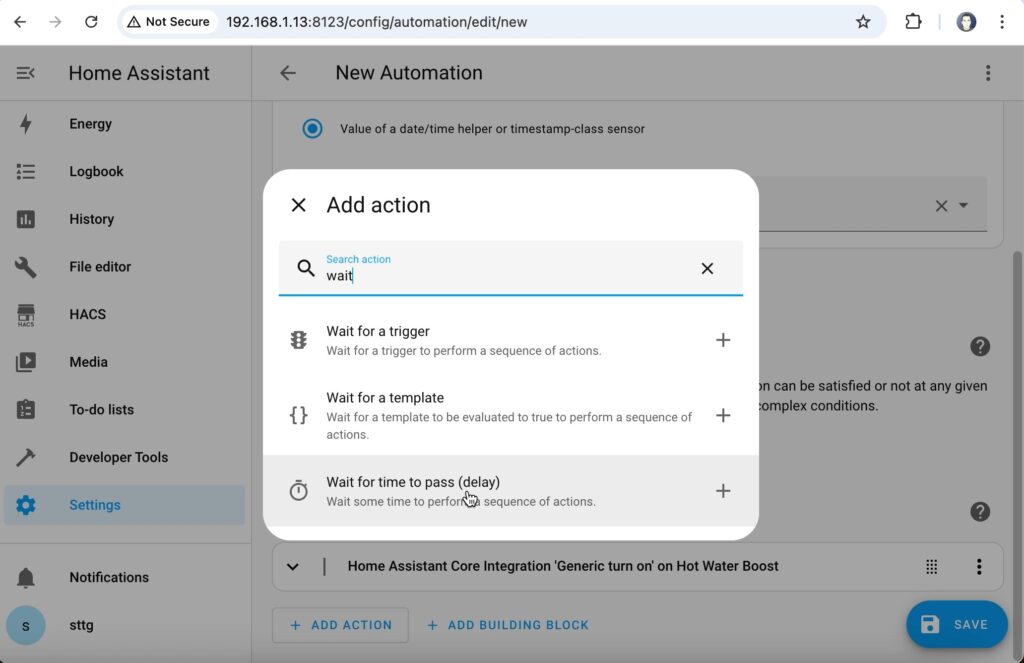
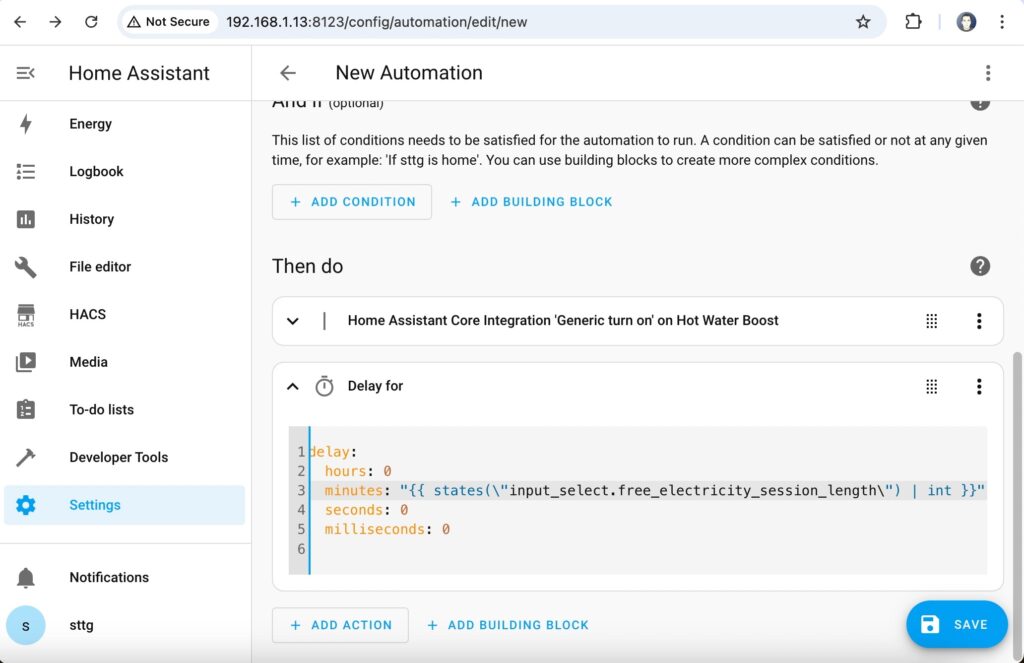
Scroll down to the "Then Do" section of the automation and add an action. The first action will be something that you wish to happen when the free electricity session start, in the example here shown in the screenshots I am going to turn on a Hot Water Boost switch. Once you've added your initial action, add a second action. This action will be of the type "Wait for time to pass (delay)". Set the 'minutes' value to 1, then click on the three dots in the top-right of the action's border to open a menu and select the Edit in YAML option. The action should switch to show you the configuration code. On the line starting with the text " minutes: " replace the '1' with the following text:
"{{ states('input_select.free_electricity_session_length') | int }}"This action will add a pause in the automation for the duration of the free electricity session as selected in the session length helper. Add a third action after this delay to perform any actions you require at the end of the session. In my screenshots I am turning off the hot water boost.
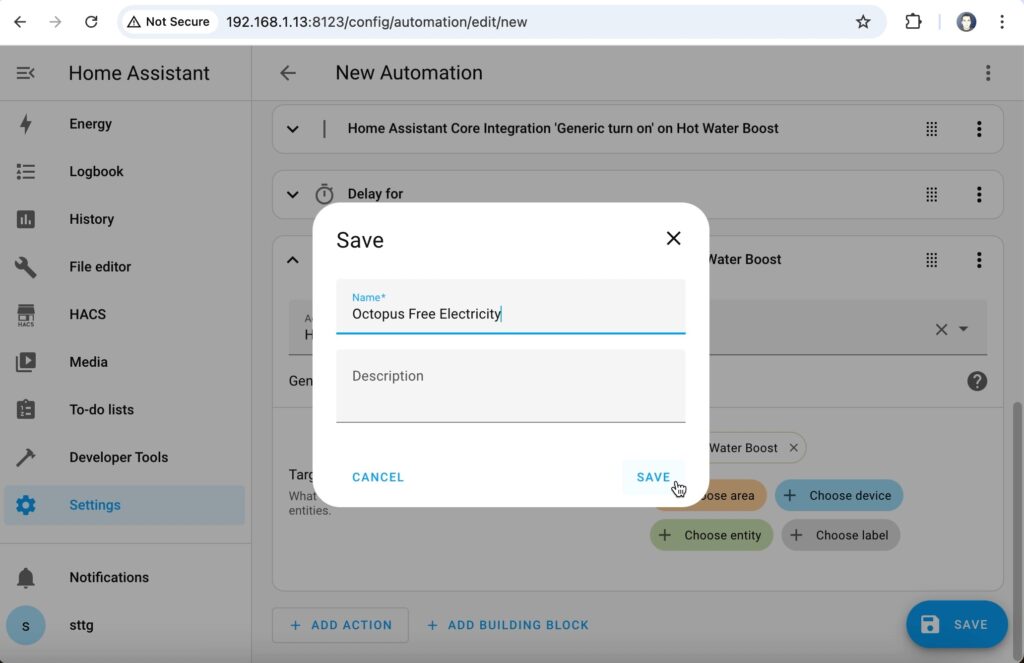
Save the automation and call it "Octopus Free Electricity".
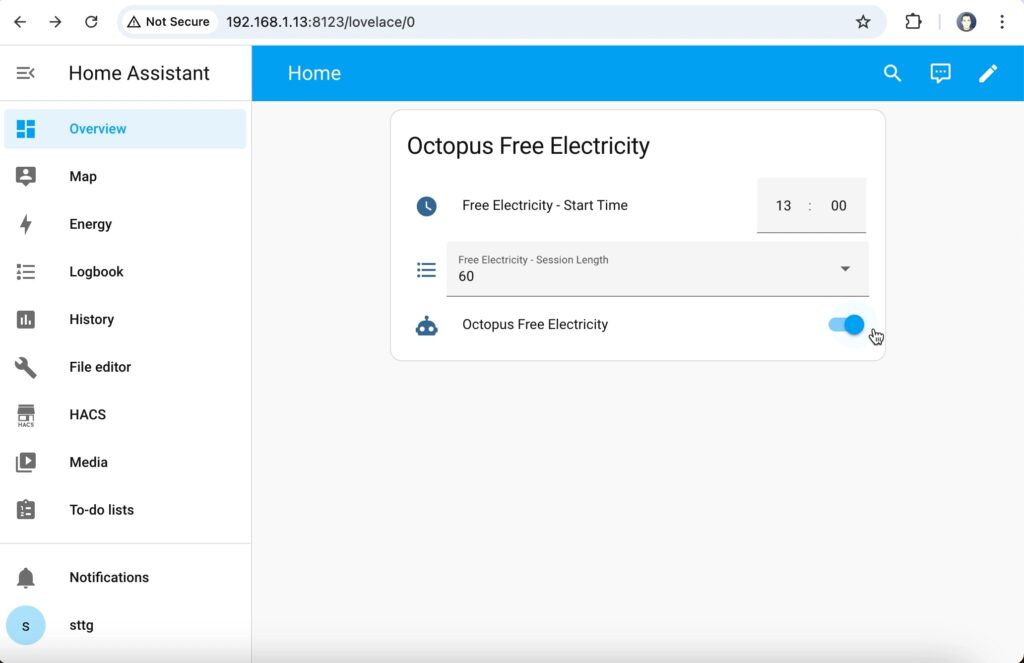
Go back to the entities card you created on your dashboard, edit it and add the new automation.octopus_free_electricity entity to the card. You should now be able to use this card to set the start time of the session, the length of the session, and also enable the automation before the session begins. Make sure you leave the automation turned off under normal circumstances though or your automation will run every day at that time!

So that's the basic construct of the automation - you'll need to customise this exactly to your own needs. But, just in case you are interested in seeing how I am using it, the following code outlines my own automation which controls my batteries, boosts my hot water and starts/stops my car charger. I'm using the GivTCP add-on to manage my GivEnergy batteries, the GivEnergy API to control my EV charger, and the Daikin integration for Home Assistant to boost the hot water. The 15 second delays between each command are to make sure that GivTCP doesn't get swamped with requests at the same time and prevents those command being dropped.
alias: Octopus Free Electricity
description: ""
trigger:
  - platform: time
    at: input_datetime.free_electricity_start_time
condition: []
action:
  - action: homeassistant.turn_off
    metadata: {}
    data: {}
    target:
      entity_id: automation.battery_ac3_pause_and_resume_discharge_based_on_export
    alias: Disable AC3 battery management
  - action: number.set_value
    metadata: {}
    data:
      value: "6000"
    target:
      entity_id: number.givtcp_chXXXXXXXX_battery_charge_rate
    alias: Set AIO charge rate to maximum
  - delay:
      hours: 0
      minutes: 0
      seconds: 15
      milliseconds: 0
  - action: select.select_option
    metadata: {}
    data:
      option: "{{ states('input_select.free_power_session_length') }}"
    target:
      entity_id: select.givtcp_chXXXXXXXX_force_charge
    alias: Force charge the AIO for the session length
  - delay:
      hours: 0
      minutes: 0
      seconds: 15
      milliseconds: 0
  - action: select.select_option
    metadata: {}
    data:
      option: "{{ states('input_select.free_power_session_length') }}"
    target:
      entity_id: select.givtcp2_ceXXXXXXXX_force_charge
    alias: Force charge the AC3 for the session length
  - action: water_heater.set_operation_mode
    metadata: {}
    data:
      operation_mode: performance
    target:
      entity_id: water_heater.altherma
    alias: Boost Hot Water
  - action: switch.turn_on
    metadata: {}
    data: {}
    target:
      entity_id: switch.givenergy_ev_plugandgo
    alias: "Car Charger: Turn on Plug&Go"
  - delay:
      hours: 0
      minutes: 0
      seconds: 15
      milliseconds: 0
  - action: switch.turn_on
    metadata: {}
    data: {}
    target:
      entity_id: switch.givenergy_ev_mode_grid
    alias: "Car Charger: Set Mode to Grid"
  - delay:
      hours: 0
      minutes: 0
      seconds: 15
      milliseconds: 0
  - action: switch.turn_on
    metadata: {}
    data: {}
    target:
      entity_id: switch.givenergy_ev_chargingstopstart
    alias: "Car Charger: Start the charge!"
  - delay:
      hours: 0
      minutes: "{{ states('input_select.free_electricity_session_length') | int }}"
      seconds: 0
      milliseconds: 0
    alias: Wait for session to finish
  - action: homeassistant.turn_on
    metadata: {}
    data: {}
    target:
      entity_id: automation.battery_ac3_pause_and_resume_discharge_based_on_export
    alias: Enable AC3 battery management
  - alias: Set AIO charge rate to 3.6kW
    action: number.set_value
    metadata: {}
    data:
      value: "3831"
    target:
      entity_id: number.givtcp_chXXXXXXXX_battery_charge_rate
  - delay:
      hours: 0
      minutes: 0
      seconds: 15
      milliseconds: 0
  - action: switch.turn_off
    metadata: {}
    data: {}
    target:
      entity_id: switch.givenergy_ev_plugandgo
    alias: "Car Charger: Turn off Plug&Go"
  - delay:
      hours: 0
      minutes: 0
      seconds: 15
      milliseconds: 0
  - action: switch.turn_off
    metadata: {}
    data: {}
    target:
      entity_id: switch.givenergy_ev_chargingstopstart
    alias: "Car Charger: Stop the charge!"
mode: single


