
Charge GivEnergy Batteries During Intelligent Octopus Go Cheap Slots

If you’ve got an EV and you charge it at home using Octopus Energy’s Intelligent Octopus Go tariff, but you also have home batteries, then you may have noticed that when Octopus give you an extra off-peak session outside of your normal off-peak hours that your home batteries get drained. Well, if you’ve got a GivEnergy battery then I’m going to show you a simple Home Assistant automation that can help you out.
A few weeks ago I had a call from Gary Does Solar and he explained the problem he had and asked me if Home Assistant could solve it. So I gave him a shopping list of parts he needed to get Home Assistant up and running. Go and check out that video if you’d like to find out about the hardware that I recommend for beginners who want to get started with Home Assistant.
Intelligent Octopus Go will always charge your car at off-peak rates. Any electricity used by your home at the same time is also billed at that low off-peak rate. So the aim with this automation is to detect when your car is charging and tell the batteries to charge at the same time. If the batteries are already full, then we want them to stay full while your car is charging so as your car and home get off peak energy rates. Then when the car stops charging, peak rates will apply so we need the battery to jump back into dynamic or eco mode.
Octopus Energy using my referral link:
speaktothegeek.co.uk/energy

Existing customer? Find out how you can benefit too. T&Cs apply (only one switching offer per household)
So thanks to a couple of members of the GivTCP Facebook group there is already an automation available to do this. Thanks to the hard work of Greg and Willy you can copy and paste their code into Home Assistant and tweak it to your needs. But I wanted something a little easier for beginners to use so I’ve turned it into what’s called a Blueprint which means you don’t need to edit any code at all to get this working. But there are some restrictions over what my blueprint can and can’t do. If you have an Ohme charger for instance, you’ll need a totally different automation and Willy has a version for you up on the Facebook group. Also, my blueprint only supports a single inverter so if you have multiple inverters then again you’ll need to go and check out Willy's automations.
Quirks
There are also a few quirks you need to be aware of because this solution is not perfect. It relies on Octopus sending a signal via their API to say when the off-peak sessions start and end. If that signal is delayed for any reason then you could end up using a bit of peak energy to charge your batteries until the automation gets the signal to stop. There’s also a bit of a built-in delay at the end of a cheap session before it stops the batteries charging in order to try and catch delayed signals and avoid longer accidental peak charges. But the important thing is that these few minutes of peak use here and there are more than offset overall by the extra cheap sessions you are getting.
This automation has been tested with a GivEnergy hybrid inverter and a Zappi charger, so if you have different devices then you might get different results.
Pre-requisites
This automation has some pre-requisites.
- Firstly you need to make sure that you have the Octopus Energy integration from BottleCapDave installed and configured to communicate with your Octopus Energy account. You can install this using HACS, which is like a third party App Store for Home Assistant.
- You will also need to install an MQTT broker called Mosquitto which is available as an add-on in Home Assistant.
- Finally you need to install GivTCP which is an add-on that communicates directly with your GivEnergy inverter and sends data to Home Assistant using MQTT. The latest version at the moment is v3 which is the version you should install.
I’m not going to go through configuring those pre-requisites in this article. At the time of writing this I don’t have any tutorials for installing those components. All of the components however have great instructions on their respective web pages.

Installing the Blueprint / Configuring the Automation
The first step is to install the blueprint in Home Assistant:
- Navigate to Settings > Automations & Scenes
- Select the 'Blueprints' tab at the top
- Click on the 'Import Blueprint' button in the bottom right
- Paste in the Blueprint URL:
https://github.com/sOckhamSter/homeassistant-blueprints/blob/main/IOG_GivEnergy_Inverter_Control.yaml
- Click on 'Preview'
- Click on 'Import Blueprint'
- The blueprint should appear in your list of blueprints within Home Assistant
Alternatively you can click the button below which will start the import into Home Assistant for you.

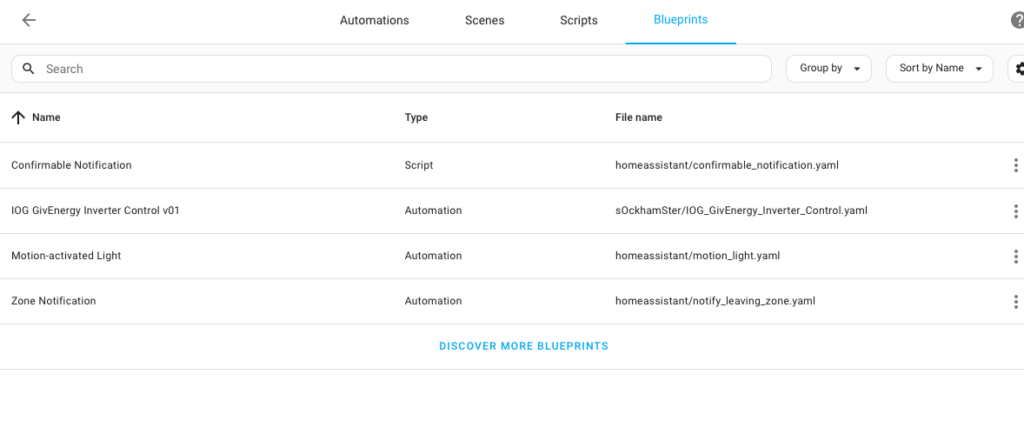
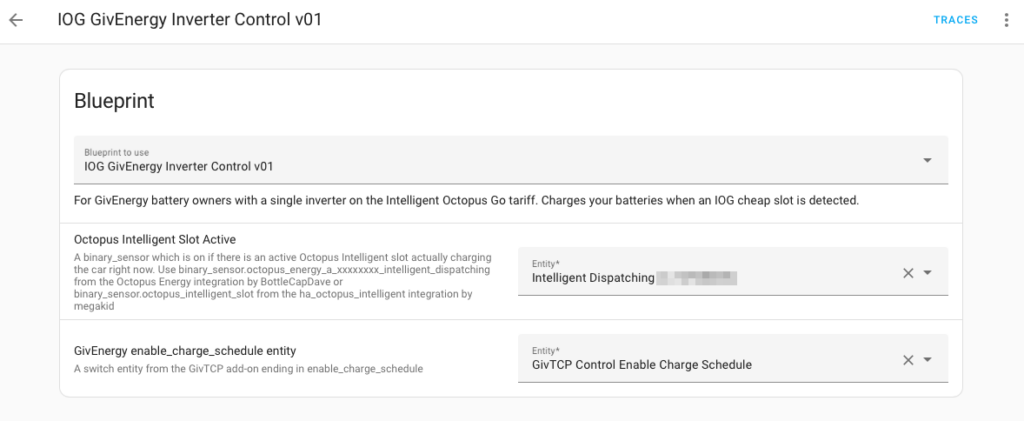
To create an automation from the blueprint:
- Click on the blueprint (named "IOG GivEnergy Inverter Control") from your list of installed blueprints
- There are two drop-downs which must be completed before the blueprint can be saved
- The first drop-down requires you to locate a binary sensor that turns on when your car is charging and off when it stops, indicating the start and end of the off-peak prices. If you are using the BottleCap Dave integration then this will be named "Off Peak" and will be associated with the device for your import electricity meter.
- The second drop-down requires you to locate a switch sensor added by GivTCP called "enable_charge_schedule"
- Once the drop-downs have been correctly completed, click on "Save"
- Accept the default automation name and save.
Your automation should now be installed and enabled (the toggle against its name should be on). It's now just a case of keeping an eye on your batteries to make sure that they charge (or at least don't drain) when your EV is also charging, and importantly that they stop charging and return to eco mode when EV charging finishes.